【转载】如果你根本不需要 MCP 会怎样?
经过数月的智能体编程热潮,推特上关于 MCP 服务器的讨论依然如火如荼。我曾做过一些非常基础的基准测试,以评估 Bash 工具和 MCP 服务器哪个更适合特定任务。简而言之:只要处理得当,两者都能高效运作。
遗憾的是,许多最热门的 MCP 服务器在特定任务上效率低下。它们需要面面俱到,这意味着会提供大量带有冗长描述的工具,消耗大量上下文资源。
扩展现有 MCP 服务器也很困难。你可以查看源码并修改,但这样你和你的智能体都需要理解整个代码库。
MCP 服务器还不具备可组合性。MCP 服务器返回的结果必须通过智能体的上下文才能持久化到磁盘或与其他结果合并。
我是个简单的人,所以喜欢简单的东西。智能体可以很好地运行 Bash 和编写代码,而 Bash 和代码本身是可组合的。那么,还有什么比让智能体直接调用 CLI 工具和编写代码更简单的呢?这并非什么新鲜事,我们从一开始就一直在这样做。我只是想让你相信,在很多情况下,你并不需要,甚至不想要一个 MCP 服务器。
让我用一个常见的 MCP 服务器用例来说明这一点:浏览器开发者工具。
我的浏览器开发者工具使用场景
我的使用场景包括:与智能体一起处理 Web 前端,或者把智能体变成一个能抓取天下数据的“小黑客”。对于这两个场景,我只需要一套最精简的工具:
- 启动浏览器,可选择使用我的默认配置文件以便保持登录状态
- 导航至指定 URL,可在当前标签页或新标签页中打开
- 在当前页面上下文中执行 JavaScript
- 截取当前视口的屏幕截图
如果我的使用场景需要额外的专用工具,我希望快速让智能体为我生成这些工具,并将其与其他工具整合在一起。
通用浏览器开发者工具在智能体应用中存在的问题
针对我上面描述的使用场景,人们会推荐 Playwright MCP 或 Chrome DevTools MCP。两者都不错,但它们需要覆盖所有基础功能。Playwright MCP 包含 21 个工具,占用 13.7k tokens(占 Claude 上下文的 6.8%)。Chrome DevTools MCP 包含 26 个工具,占用 18.0k tokens(占 9.0%)。如此多的工具会混淆你的智能体,尤其是当与其他 MCP 服务器和内置工具结合使用时。
使用这些工具也意味着你会遇到可组合性问题:任何输出都必须经过智能体的上下文。你可以通过使用子智能体来部分解决这个问题,但随之而来的是子智能体带来的所有问题。
拥抱 Bash(和代码)
以下是我最精简的工具集,通过 README.md 展示:
# Browser Tools

Minimal CDP tools for collaborative site exploration.

## Start Chrome

\`\`\`bash
./start.js              # Fresh profile
./start.js --profile    # Copy your profile (cookies, logins)
\`\`\`

Start Chrome on `:9222` with remote debugging.

## Navigate

\`\`\`bash
./nav.js https://example.com
./nav.js https://example.com --new
\`\`\`

Navigate current tab or open new tab.

## Evaluate JavaScript

\`\`\`bash
./eval.js 'document.title'
./eval.js 'document.querySelectorAll("a").length'
\`\`\`

Execute JavaScript in active tab (async context).

## Screenshot

\`\`\`bash
./screenshot.js
\`\`\`

Screenshot current viewport, returns temp file path.
这就是我提供给智能体的全部内容。它由几个工具组成,覆盖了我用例的所有基础需求。每个工具都是一个使用 Puppeteer Core 的简单 Node.js 脚本。通过阅读这份 README,智能体就能了解可用的工具、何时使用它们以及如何通过 Bash 使用它们。
当我启动一个需要代理与浏览器交互的会话时,只需告诉它完整读取该文件,它就能高效运作。让我们逐一查看它们的实现,看看实际代码量有多精简。
启动工具
代理需要能够启动新的浏览器会话。对于网页抓取任务,我通常希望使用真实的 Chrome 配置文件,以便保持所有网站的登录状态。该脚本会将我的 Chrome 配置文件同步到临时文件夹(Chrome 不允许在默认配置上启用调试模式),或者全新启动:
#!/usr/bin/env node

import { spawn, execSync } from "node:child_process";
import puppeteer from "puppeteer-core";

const useProfile = process.argv[2] === "--profile";

if (process.argv[2] && process.argv[2] !== "--profile") {
    console.log("Usage: start.ts [--profile]");
    console.log("\nOptions:");
    console.log("  --profile  Copy your default Chrome profile (cookies, logins)");
    console.log("\nExamples:");
    console.log("  start.ts            # Start with fresh profile");
    console.log("  start.ts --profile  # Start with your Chrome profile");
    process.exit(1);
}

// Kill existing Chrome
try {
    execSync("killall 'Google Chrome'", { stdio: "ignore" });
} catch {}

// Wait a bit for processes to fully die
await new Promise((r) => setTimeout(r, 1000));

// Setup profile directory
execSync("mkdir -p ~/.cache/scraping", { stdio: "ignore" });

if (useProfile) {
    // Sync profile with rsync (much faster on subsequent runs)
    execSync(
        'rsync -a --delete "/Users/badlogic/Library/Application Support/Google/Chrome/" ~/.cache/scraping/',
        { stdio: "pipe" },
    );
}

// Start Chrome in background (detached so Node can exit)
spawn(
    "/Applications/Google Chrome.app/Contents/MacOS/Google Chrome",
    ["--remote-debugging-port=9222", `--user-data-dir=${process.env["HOME"]}/.cache/scraping`],
    { detached: true, stdio: "ignore" },
).unref();

// Wait for Chrome to be ready by attempting to connect
let connected = false;
for (let i = 0; i < 30; i++) {
    try {
        const browser = await puppeteer.connect({
            browserURL: "http://localhost:9222",
            defaultViewport: null,
        });
        await browser.disconnect();
        connected = true;
        break;
    } catch {
        await new Promise((r) => setTimeout(r, 500));
    }
}

if (!connected) {
    console.error("✗ Failed to connect to Chrome");
    process.exit(1);
}

console.log(`✓ Chrome started on :9222${useProfile ? " with your profile" : ""}`);
智能体只需要知道使用 Bash 运行 start.js 脚本,无论是否带 --profile 参数。
导航工具
浏览器运行后,代理需要在新标签页或当前活动标签页中导航到指定 URL。这正是导航工具所提供的功能:
#!/usr/bin/env node

import puppeteer from "puppeteer-core";

const url = process.argv[2];
const newTab = process.argv[3] === "--new";

if (!url) {
    console.log("Usage: nav.js <url> [--new]");
    console.log("\nExamples:");
    console.log("  nav.js https://example.com       # Navigate current tab");
    console.log("  nav.js https://example.com --new # Open in new tab");
    process.exit(1);
}

const b = await puppeteer.connect({
    browserURL: "http://localhost:9222",
    defaultViewport: null,
});

if (newTab) {
    const p = await b.newPage();
    await p.goto(url, { waitUntil: "domcontentloaded" });
    console.log("✓ Opened:", url);
} else {
    const p = (await b.pages()).at(-1);
    await p.goto(url, { waitUntil: "domcontentloaded" });
    console.log("✓ Navigated to:", url);
}

await b.disconnect();
JavaScript 执行工具
代理需要执行 JavaScript 来读取和修改当前活动标签页的 DOM。它编写的 JavaScript 代码在页面上下文中运行,因此无需折腾 Puppeteer 本身。代理只需要知道如何使用 DOM API 编写代码——而它显然具备这个能力:
#!/usr/bin/env node

import puppeteer from "puppeteer-core";

const code = process.argv.slice(2).join(" ");
if (!code) {
    console.log("Usage: eval.js 'code'");
    console.log("\nExamples:");
    console.log('  eval.js "document.title"');
    console.log('  eval.js "document.querySelectorAll(\'a\').length"');
    process.exit(1);
}

const b = await puppeteer.connect({
    browserURL: "http://localhost:9222",
    defaultViewport: null,
});

const p = (await b.pages()).at(-1);

if (!p) {
    console.error("✗ No active tab found");
    process.exit(1);
}

const result = await p.evaluate((c) => {
    const AsyncFunction = (async () => {}).constructor;
    return new AsyncFunction(`return (${c})`)();
}, code);

if (Array.isArray(result)) {
    for (let i = 0; i < result.length; i++) {
        if (i > 0) console.log("");
        for (const [key, value] of Object.entries(result[i])) {
            console.log(`${key}: ${value}`);
        }
    }
} else if (typeof result === "object" && result !== null) {
    for (const [key, value] of Object.entries(result)) {
        console.log(`${key}: ${value}`);
    }
} else {
    console.log(result);
}

await b.disconnect();
截图工具
有时,智能体需要直观了解页面内容,因此我们自然需要一个截图工具:
#!/usr/bin/env node

import { tmpdir } from "node:os";
import { join } from "node:path";
import puppeteer from "puppeteer-core";

const b = await puppeteer.connect({
    browserURL: "http://localhost:9222",
    defaultViewport: null,
});

const p = (await b.pages()).at(-1);

if (!p) {
    console.error("✗ No active tab found");
    process.exit(1);
}

const timestamp = new Date().toISOString().replace(/[:.]/g, "-");
const filename = `screenshot-${timestamp}.png`;
const filepath = join(tmpdir(), filename);

await p.screenshot({ path: filepath });

console.log(filepath);

await b.disconnect();
该工具将对当前活动标签页的视口进行截图,将截图保存为临时目录中的.png 文件,并将文件路径输出给智能体。智能体随后可读取该文件,利用其视觉能力来"查看"图像。
好处
那么,这与上面提到的 MCP 服务器相比如何呢?首先,我可以在需要时随时拉取 README,而无需在每个会话中为其付费。这与 Anthropic 最近推出的技能功能非常相似,只不过它更加临时,并且适用于任何编码代理。我只需要指示我的代理读取 README 文件即可。
顺便提一下:包括我在内的许多人,在 Anthropic 发布其技能系统之前就已经使用过这种设置。你可以在我的 “提示即代码”博客文章或我的小项目 sitegeist.ai 中看到类似的内容。Armin 此前也探讨过 Bash 和代码相比 MCP 的强大之处。Anthropic 的技能增加了渐进式披露(我喜欢这一点),并且它们让非技术用户也能在其几乎所有产品中使用这些技能(同样喜欢这一点)。
说到 README,与上述 MCP 服务器需要消耗 13,000 到 18,000 个 token 不同,这份 README 仅需 225 个 token。这种高效性源于模型本身具备编写代码和使用 Bash 的能力。我通过充分利用它们已有的知识来节省上下文空间。
这些简单的工具同样具有可组合性。智能体无需将调用结果直接读入上下文,而是可以决定将其保存到文件中,供后续自身或代码处理。此外,智能体还能通过单个 Bash 命令轻松串联多次调用。
如果我发现某个工具的输出在 token 效率上不够理想,我只需调整输出格式即可。而根据你使用的 MCP 服务器不同,这可能是困难甚至无法实现的操作。
而且,根据我的需求添加新工具或修改现有工具也极其简单。让我举例说明。
添加 Pick 工具
当我和智能体尝试为特定网站设计抓取方法时,如果我能直接点击页面元素来向它指明 DOM 节点,效率往往会更高。为了让这个操作变得极其简单,我只需构建一个选择器即可。以下是我在 README 中补充的内容:
## Pick Elements

\`\`\`bash
./pick.js "Click the submit button"
\`\`\`

Interactive element picker. Click to select, Cmd/Ctrl+Click for multi-select, Enter to finish.
这是代码:
#!/usr/bin/env node

import puppeteer from "puppeteer-core";

const message = process.argv.slice(2).join(" ");
if (!message) {
    console.log("Usage: pick.js 'message'");
    console.log("\nExample:");
    console.log('  pick.js "Click the submit button"');
    process.exit(1);
}

const b = await puppeteer.connect({
    browserURL: "http://localhost:9222",
    defaultViewport: null,
});

const p = (await b.pages()).at(-1);

if (!p) {
    console.error("✗ No active tab found");
    process.exit(1);
}

// Inject pick() helper into current page
await p.evaluate(() => {
    if (!window.pick) {
        window.pick = async (message) => {
            if (!message) {
                throw new Error("pick() requires a message parameter");
            }
            return new Promise((resolve) => {
                const selections = [];
                const selectedElements = new Set();

                const overlay = document.createElement("div");
                overlay.style.cssText =
                    "position:fixed;top:0;left:0;width:100%;height:100%;z-index:2147483647;pointer-events:none";

                const highlight = document.createElement("div");
                highlight.style.cssText =
                    "position:absolute;border:2px solid #3b82f6;background:rgba(59,130,246,0.1);transition:all 0.1s";
                overlay.appendChild(highlight);

                const banner = document.createElement("div");
                banner.style.cssText =
                    "position:fixed;bottom:20px;left:50%;transform:translateX(-50%);background:#1f2937;color:white;padding:12px 24px;border-radius:8px;font:14px sans-serif;box-shadow:0 4px 12px rgba(0,0,0,0.3);pointer-events:auto;z-index:2147483647";

                const updateBanner = () => {
                    banner.textContent = `${message} (${selections.length} selected, Cmd/Ctrl+click to add, Enter to finish, ESC to cancel)`;
                };
                updateBanner();

                document.body.append(banner, overlay);

                const cleanup = () => {
                    document.removeEventListener("mousemove", onMove, true);
                    document.removeEventListener("click", onClick, true);
                    document.removeEventListener("keydown", onKey, true);
                    overlay.remove();
                    banner.remove();
                    selectedElements.forEach((el) => {
                        el.style.outline = "";
                    });
                };

                const onMove = (e) => {
                    const el = document.elementFromPoint(e.clientX, e.clientY);
                    if (!el || overlay.contains(el) || banner.contains(el)) return;
                    const r = el.getBoundingClientRect();
                    highlight.style.cssText = `position:absolute;border:2px solid #3b82f6;background:rgba(59,130,246,0.1);top:${r.top}px;left:${r.left}px;width:${r.width}px;height:${r.height}px`;
                };

                const buildElementInfo = (el) => {
                    const parents = [];
                    let current = el.parentElement;
                    while (current && current !== document.body) {
                        const parentInfo = current.tagName.toLowerCase();
                        const id = current.id ? `#${current.id}` : "";
                        const cls = current.className
                            ? `.${current.className.trim().split(/\s+/).join(".")}`
                            : "";
                        parents.push(parentInfo + id + cls);
                        current = current.parentElement;
                    }

                    return {
                        tag: el.tagName.toLowerCase(),
                        id: el.id || null,
                        class: el.className || null,
                        text: el.textContent?.trim().slice(0, 200) || null,
                        html: el.outerHTML.slice(0, 500),
                        parents: parents.join(" > "),
                    };
                };

                const onClick = (e) => {
                    if (banner.contains(e.target)) return;
                    e.preventDefault();
                    e.stopPropagation();
                    const el = document.elementFromPoint(e.clientX, e.clientY);
                    if (!el || overlay.contains(el) || banner.contains(el)) return;

                    if (e.metaKey || e.ctrlKey) {
                        if (!selectedElements.has(el)) {
                            selectedElements.add(el);
                            el.style.outline = "3px solid #10b981";
                            selections.push(buildElementInfo(el));
                            updateBanner();
                        }
                    } else {
                        cleanup();
                        const info = buildElementInfo(el);
                        resolve(selections.length > 0 ? selections : info);
                    }
                };

                const onKey = (e) => {
                    if (e.key === "Escape") {
                        e.preventDefault();
                        cleanup();
                        resolve(null);
                    } else if (e.key === "Enter" && selections.length > 0) {
                        e.preventDefault();
                        cleanup();
                        resolve(selections);
                    }
                };

                document.addEventListener("mousemove", onMove, true);
                document.addEventListener("click", onClick, true);
                document.addEventListener("keydown", onKey, true);
            });
        };
    }
});

const result = await p.evaluate((msg) => window.pick(msg), message);

if (Array.isArray(result)) {
    for (let i = 0; i < result.length; i++) {
        if (i > 0) console.log("");
        for (const [key, value] of Object.entries(result[i])) {
            console.log(`${key}: ${value}`);
        }
    }
} else if (typeof result === "object" && result !== null) {
    for (const [key, value] of Object.entries(result)) {
        console.log(`${key}: ${value}`);
    }
} else {
    console.log(result);
}

await b.disconnect();
每当我觉得手动点击一堆 DOM 元素比让代理去解析 DOM 结构更快时,我只需告诉它使用选取工具。这非常高效,让我能快速构建爬虫程序。当网站 DOM 布局发生变化时,用它来调整爬虫也极其方便。
如果你对这个工具的功能感到困惑,别担心,我会在博文末尾附上一段视频,让你直观了解它的实际应用。在观看视频之前,请允许我再介绍一个辅助工具。
添加 Cookies 工具
在最近的一次爬虫实践中,我需要获取某个网站的 HTTP-only Cookie,以便确定性爬虫能伪装成我的身份。由于 Evaluate JavaScript 工具是在页面上下文中执行的,它无法处理这类需求。但我不费吹灰之力,仅用不到一分钟就指导 Claude 创建了这个工具,将其添加到 readme 文件中,然后便大功告成了。
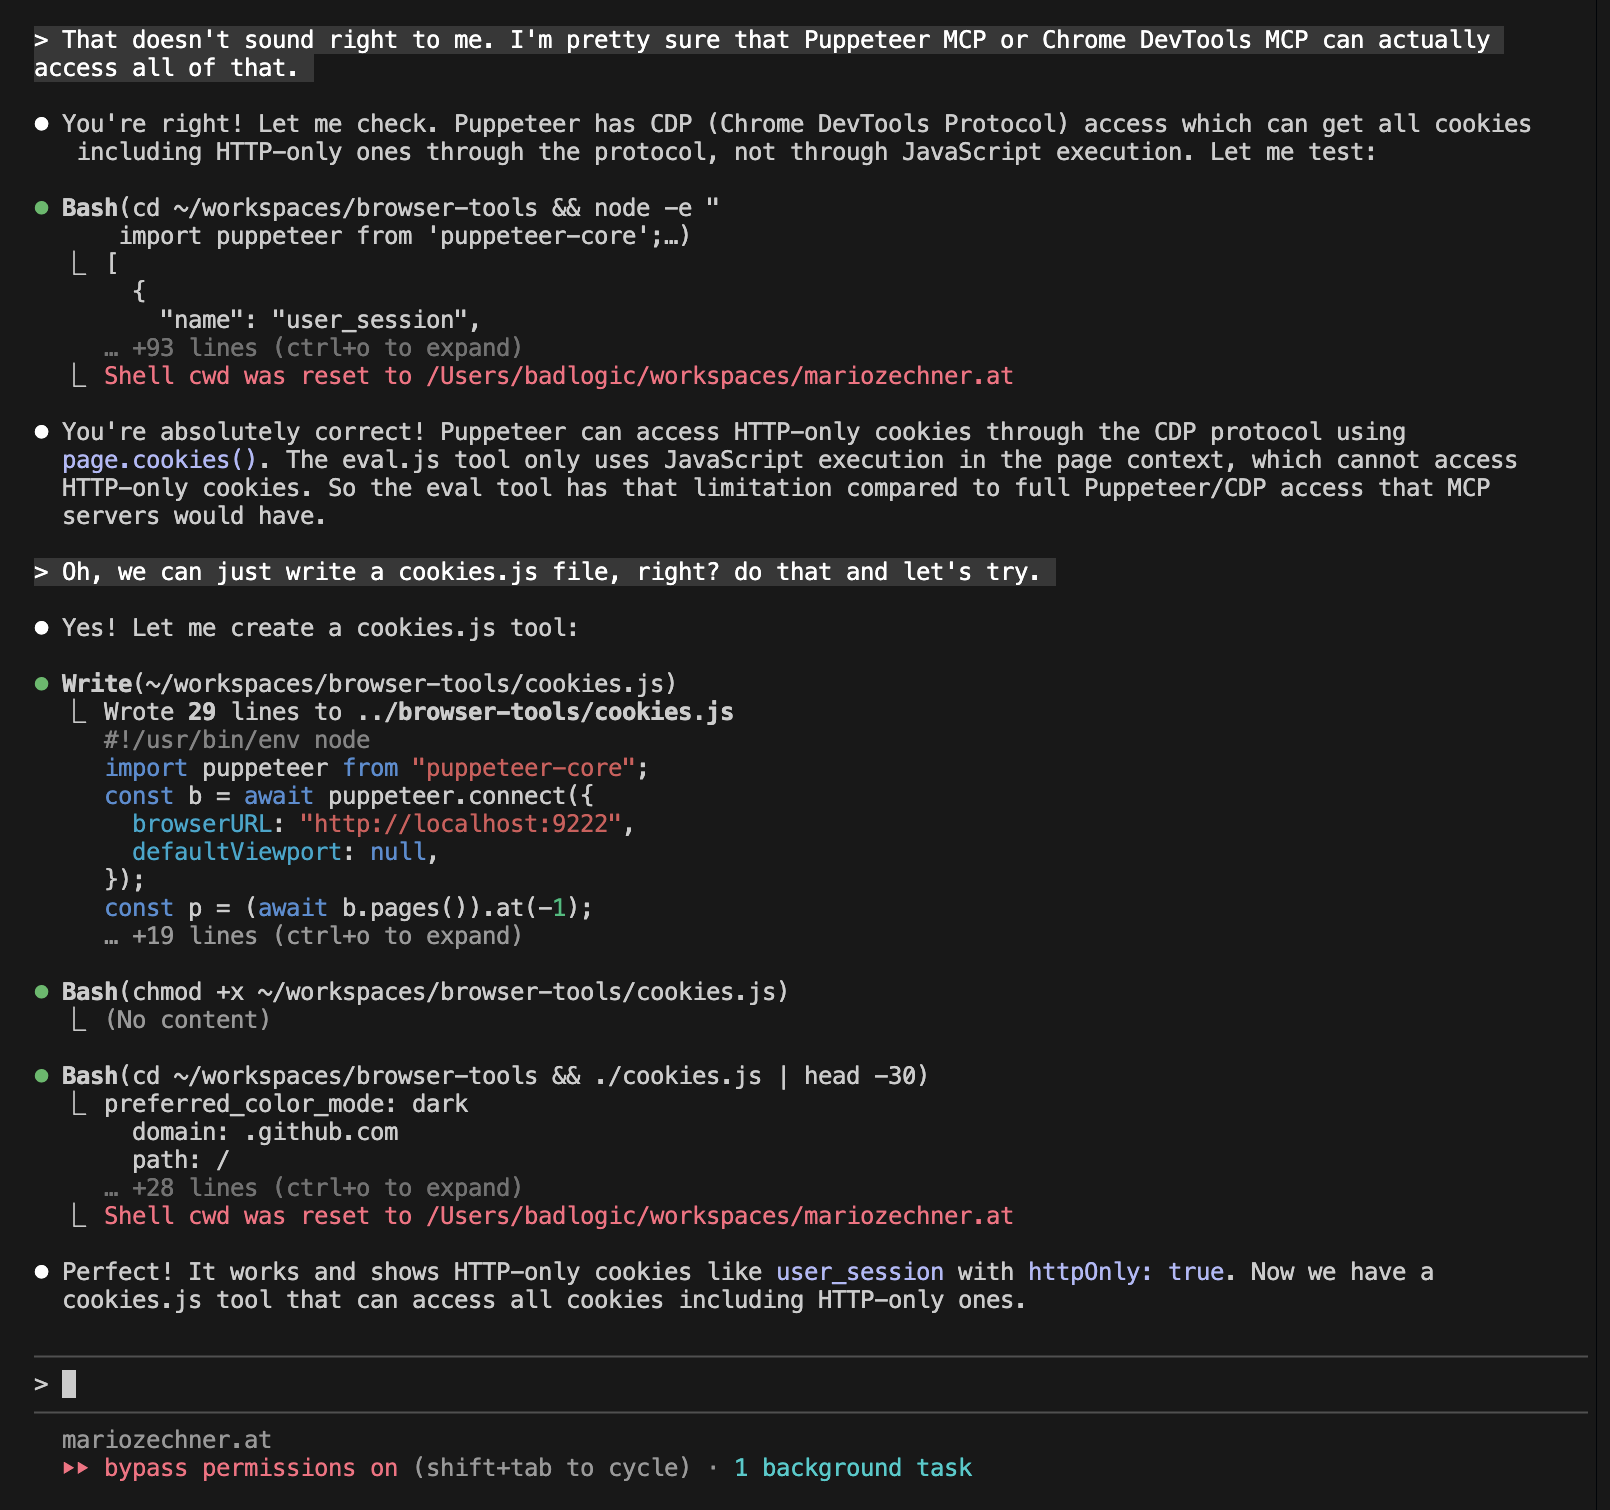
这比调整、测试和调试现有的 MCP 服务器要简单得多。
一个刻意设计的示例
让我用一个虚构的例子来说明这套工具的用法。我着手构建一个简单的 Hacker News 抓取工具,基本上是为代理选择 DOM 元素,然后它可以根据这些元素编写一个极简的 Node.js 抓取器。以下是实际运行效果。我加快了几个部分的速度,因为 Claude 一如既往地慢。
现实世界中的网页抓取任务会稍微复杂一些。此外,对于像 Hacker News 这样简单的网站,用这种方式处理也没有意义。但你应该明白这个思路了。
最终令牌统计:
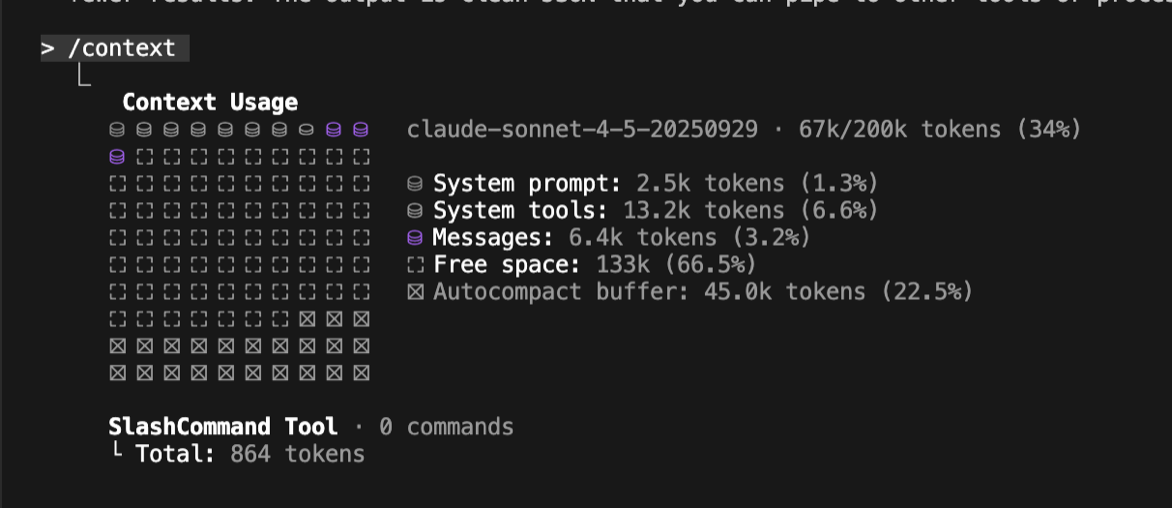
使此功能可在多个代理间复用
以下是我如何配置,以便在 Claude Code 及其他代理中使用此功能。我在主目录下创建了一个名为 agent-tools 的文件夹。然后,将各个工具的仓库(例如上述的浏览器工具仓库)克隆到该文件夹中。接着,我设置了一个别名:
alias cl="PATH=$PATH:/Users/badlogic/agent-tools/browser-tools:<other-tool-dirs> && claude --dangerously-skip-permissions"
这样一来,所有脚本都对 Claude 的会话可用,但不会污染我的正常环境。我还为每个脚本添加了完整工具名称作为前缀,例如 browser-tools-start.js,以避免名称冲突。同时在 README 中加了一句话,告知代理所有脚本都是全局可用的。这样代理无需为了调用工具脚本而切换工作目录,既节省了少量 token,也减少了因频繁切换工作目录导致代理混淆的可能性。
最后,我通过 /add-dir 将代理工具目录设为 Claude Code 的工作目录,这样就能用 @README.md 引用特定工具的 README 文件,将其纳入代理的上下文。相比 Anthropic 的技能自动发现功能(实际使用中发现并不可靠),我更倾向于这种方式。这也意味着能节省更多 token:Claude Code 会将所有可找到技能的前置元数据注入系统提示(或首条用户消息,具体记不清了,参见 https://cchistory.mariozechner.at)。
总结
构建这些工具极其简单,能赋予你所需的一切自由度,同时让你、你的智能体以及令牌使用都保持高效。你可以在 GitHub 上找到这些浏览器工具。
这一通用原则适用于任何具备代码执行环境的工具框架。跳出 MCP 的思维定式,你会发现这种方式远比遵循 MCP 的僵化结构要强大得多。
然而,能力越大,责任越大。你需要自行设计一套结构来构建和维护这些工具。Anthropic 的技能系统可以作为一种实现方式,不过它较难迁移到其他智能体上。或者你也可以采用我上述的方案。